 |
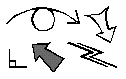
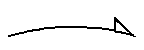
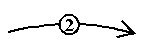
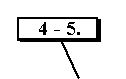
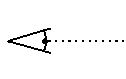
Turn the model over to the direction that the arrow shows. |
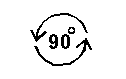 |
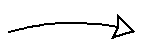
Rotate the model the given degree clockwise or counterclockwise. |
 |
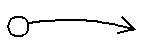
Push the paper here. |
 |
Place your finger here. |
 |
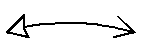
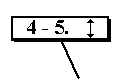
Repeat the given range of steps. |
 |
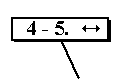
Repeat in vertical mirror image, so that "up" will be "down" (and vice versa). |
 |
Repeat in horizontal mirror image, so that "right" will be "left" (and vice versa). |
 |
Repeat in both horizontal and vertical mirror image. |
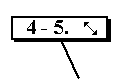 |
Repeat in diagonal mirror image. |
|
 |
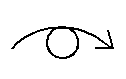
View the model from this vantage point. |
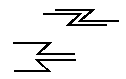 |
Zigzags give you information on how the layers are arranged after a pleat or a crimp. |
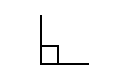 |
A right angle will prompt you when creases and (or) edges have to be at right angels to each other. |
 |
Corresponding points will be indicated by spots of the same color (white-white or black-black). |
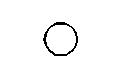 |
The small TRANSPARENT circle means: note this area. |
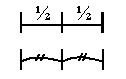 |
Equal distances. |
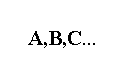 |
Black letters distinguish visible flaps, points, creases or edges when necessary. |
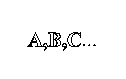 |
White letters distinguish invisible (hidden) flaps, points, creases, edges or pockets when necessary. |
|